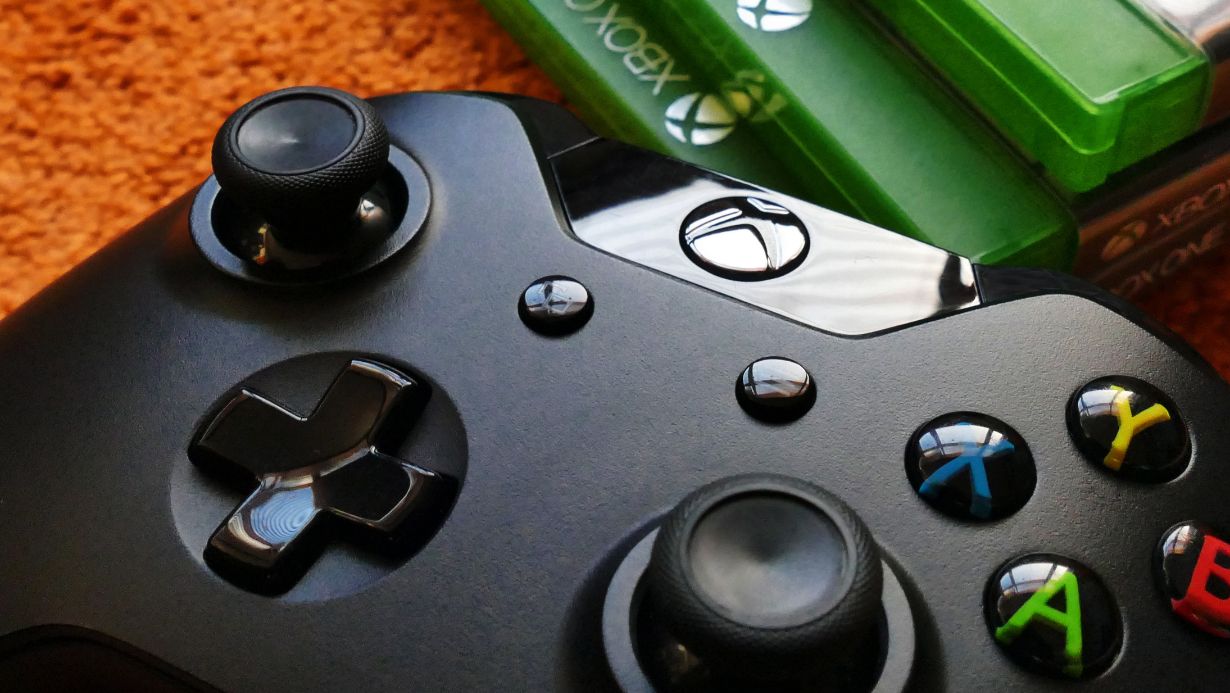
To take apart an Xbox Elite Series 2 controller, you will need the following tools:
| Tool | Description |
| Torx T6 screwdriver | This is a 6-point screwdriver that will allow you to remove the six screws on the back of the controller. |
| Plastic opening tool | This tool is used to gently pry apart the two halves of the controller shell without damaging the plastic. |
| Precision tweezers | These tweezers will help you remove small components from the controller, such as the rumble motors or small screws. |
| Spudger | This is a flat tool with a pointed end that can be used to lift up small components or pry apart small clips without damaging the surrounding plastic. |
| Phillips head screwdriver | This will be required if you need to remove the battery cover or battery pack from the controller. |
| Magnetic screw pad | This optional tool is useful for keeping track of small screws and preventing them from getting lost. |
How to Take Apart Xbox Elite Series 2 Controller
Taking apart the Xbox Elite Series 2 controller requires a few basic tools. One of the essential tools for this process are screwdrivers. You will need a Philips and tri-wing screwdriver head to begin disassembly. Additionally, a pry tool is also needed to remove some of the pieces from the controller. We’ll discuss how to use these tools and other tools needed to completely take apart the Xbox Elite Series 2 controller.
Phillips Head Screwdriver
A Phillips head screwdriver is one of the essential tools needed to take apart an Xbox Elite Series 2 controller. Here are the steps to follow:
|
|
|
|
Pro tip: Make sure to use a properly sized Phillips head screwdriver to avoid stripping the screws or causing damage to the controller.
Flat Head Screwdriver
A flat head screwdriver is a fundamental tool to have in your kit when you need to take apart an Xbox Elite Series 2 controller. However, besides a screwdriver, you will also need other tools such as prying tools to remove the casing of the controller without damaging the internal components.
Here are the tools you will require:
| Tool | Description |
| Flat Head Screwdriver | This tool will help you unscrew the screws that hold the casing of the controller in place. |
| Pry tools | These tools are useful for opening up the controller without damaging the delicate components inside. It would be best if you had different sizes of pry tools as the controller’s casing has parts that require different sizes of pry tools for easy opening. |
| Tweezers | These tools will help in handling sensitive electronic components to prevent static shocks that could ruin the controller. |
| Spudger Tool | This tool is perfect for disconnecting the ribbon cable connectors from the controller without damaging the cables. |
| Prying knife | This tool is useful in opening up the controller’s tricky areas where pry tools cannot reach. |

T5 Torx Screwdriver
The T5 Torx screwdriver is an essential tool for taking apart an Xbox Elite Series 2 Controller. Here’s why:
|
|
|
|
Nylon or Metal Pry Tool
When taking apart an Xbox Elite Series 2 controller, both nylon and metal pry tools can be useful for removing screws and separating the casing of the controller. Nylon pry tools are a safer option as they are less likely to damage the delicate electronics inside the controller. They are also less likely to scratch the surface of the device.
However, metal pry tools are more durable and can be more effective at removing stubborn screws and prying apart the casing. They are also better suited for heavy-duty tasks. When using either tool, it’s important to be gentle and apply pressure evenly to prevent causing any damage to the controller’s components. Pro Tip: always use the smallest tool necessary for the job to minimize the risk of damage.
Cleaning Supplies
Taking apart an Xbox Elite Series 2 controller is a delicate process that requires the right tools to ensure you execute the job correctly. To take apart your Xbox Elite Series 2 controller, you will need a few specific cleaning supplies. These supplies include a microfiber cloth, cotton swabs, a small phillips head screwdriver, and a few other items. In this section, we will discuss the supplies needed to take apart your controller.
Compressed Air Can
A compressed air can is an essential tool to have when cleaning an Xbox Elite Series 2 controller as it can efficiently blast away dirt and debris from hard-to-reach areas without causing any damage to the controller. Additionally, a small Phillips head screwdriver and a plastic opening tool are also necessary to disassemble the controller safely.
Start by removing the six screws on the back of the controller with the screwdriver. Using the opening tool, carefully separate the front and back of the controller to access the internal components. Proceed with cleaning the individual parts with a dry, lint-free cloth, and use the compressed air can to blow away any remaining debris. Reassemble the controller, and it should work smoothly and respond accurately to your inputs.
Isopropyl Alcohol
Isopropyl alcohol is a versatile cleaning supply that can be used for a variety of purposes, including cleaning and disinfecting electronics such as the Xbox Elite Series 2 controller. Here are the tools you will need to take apart your Xbox Elite Series 2 controller:
| T8 Torx screwdriver |
| Spudger tool |
| Plastic opening tool |
| Tweezers |
| Brush |
| Isopropyl alcohol |
| Microfiber cloth |
Once you have the necessary tools, you can start disassembling the controller to clean and maintain it. Use the brush to remove any dust or debris from the controller, then use the spudger tool and plastic opening tool to carefully remove the faceplate and other parts of the controller. Use the tweezers and microfiber cloth to clean the controller components thoroughly, and apply isopropyl alcohol where needed to disinfect and sanitize the controller. Once cleaned, reassemble the controller to enjoy improved performance and longevity.
Microfiber Cloth
Microfiber cloths are an essential cleaning tool for disassembling your Xbox Elite Series 2 controller. Microfiber cloths are made of synthetic materials and are designed to pick up and trap dust and debris without scratching surfaces.
Apart from regular cleaning, you can use microfiber cloths for the following steps when taking apart your Xbox Elite Series 2 controller:
| Step | Description |
| 1 | Use a microfiber cloth to gently clean the controller’s surface before disassembly. |
| 2 | Use a microfiber cloth to hold the controller while taking it apart to avoid leaving fingerprints or oils on the surface. |
| 3 | Use a microfiber cloth to wipe down the internal components of the controller after disassembly to remove dust or debris. |
Preparation Steps Before Taking Apart the Xbox Elite Series 2 Controller
Taking apart the Xbox Elite Series 2 controller can be a daunting task if you don’t have the right tools. Before you begin the process, you’ll need a few items to have on hand. These include a Phillips head screwdriver, a plastic opening tool, a pair of tweezers and a pry tool. With those tools, you’ll be ready to safely and quickly take apart your Xbox Elite Series 2 controller.
Turn Off the Controller and Unplug It from the Console
Before taking apart the Xbox Elite Series 2 controller, it’s essential to prepare by turning off the controller and unplugging it from the console. This helps prevent any damage to the controller or console and ensures a successful disassembly.
Here are the preparation steps to follow:
| Step | Instruction |
| 1 | Turn off the controller by holding down the Xbox button for 3 seconds. |
| 2 | Unplug the controller from the console or PC. |
| 3 | Gather the necessary tools for disassembly, including a T6 Torx screwdriver, a small Phillips head screwdriver, and a plastic opening tool. |
| 4 | Ensure you have a clean and well-lit workspace free of any static electricity. |
Using this preparation procedure, it is possible to disassemble the Xbox Elite Series 2 controller safely and efficiently. Just remember to reassemble the controller carefully and securely to avoid any damage to the device.
Remove Any Batteries or Accessories
Before taking apart your Xbox Elite Series 2 controller, the first step is to remove any batteries or accessories attached to it. This minimizes the risk of electric shock and other injuries that can occur during disassembly. The tools you’ll need to take apart an Xbox Elite Series 2 controller include:
| Tool | Description |
| A Torx T6 screwdriver | This tool is used to remove the screws that hold the controller shell in place. |
| A plastic opening tool | This tool is used to pry apart the controller shell without scratching or damaging it. |
| A pair of tweezers | This tool is used to handle small screws and other components. |
Make sure you have all the required tools and that they’re in good condition before you begin disassembly.
Choose a Clean and Flat Workspace
Before taking apart your Xbox Elite Series 2 controller, it’s crucial to prepare your workspace to ensure a smooth and trouble-free process. Here’s how you can do it:
- Choose a clean, well-lit, and flat surface to work on. This will help you keep track of the small parts and prevent them from getting lost.
- Gather all the necessary tools and equipment, including a T6 and T8 Torx screwdriver, a pry tool, and a clean microfiber cloth.
Once you have your workspace set up, follow these steps to take apart your Xbox Elite Series 2 controller:
|
|
|
|
|
|
How to Take Apart the Xbox Elite Series 2 Controller
Taking apart an Xbox Elite Series 2 controller can be a challenging task, but with some simple tools and the right instructions, it is possible to do so. In this guide, we will discuss the tools you need and the step-by-step process for taking apart your controller.
Remove the Screws on the Back of the Controller
To take apart the Xbox Elite Series 2 controller, start by removing the screws on the back of the device.
| Tools Needed |
| 1. Torx T8 security screwdriver: This specialized screwdriver is required to remove the screws on the back of the Elite Series 2 controller. |
| 2. Plastic pry tool: A plastic pry tool is necessary to open up the casing of the controller without damaging it. |
Once you have the necessary tools, follow these steps:
- Use the Torx T8 security screwdriver to remove the screws on the back of the controller.
- Use the plastic pry tool to gently separate the front and back casing of the controller.
- Be careful not to damage any of the internal components as you take apart the controller.
Remember to keep track of all the screws and components as you take apart your controller so that you can easily put it back together again.
Separate the Front and Back Plates of the Controller with a Pry Tool
If you’re looking to take apart your Xbox Elite Series 2 controller, you’ll need a few tools to get started, including a pry tool, a Torx T8 security screwdriver, and a spudger.
Here are the steps to follow to take apart your Xbox Elite Series 2 controller:
| 1. | Use the pry tool to separate the front and back plates of the controller. |
| 2. | Use the Torx T8 security screwdriver to remove the screws holding the controller motherboard in place. |
| 3. | Use the spudger to disconnect any ribbon cables or wires connecting the motherboard to the controller. |
| 4. | Gently lift the motherboard out of the controller shell. |
| 5. | Repeat the process in reverse to reassemble your controller. |
It is important to remember to take your time and be careful while disassembling and reassembling your controller. Damage caused to your controller while attempting to take it apart can cause your warranty to be voided.
Carefully Remove any Cables or Ribbon Connectors
Taking apart an Xbox Elite Series 2 controller can be a delicate process, and it’s essential to take care when removing any cables or ribbon connectors to avoid damaging your device.
| Tools |
| – A Torx T6 screwdriver |
| – A small Phillips screwdriver |
| – A plastic spudger or pry tool |
| – Precision tweezers |
| – A soldering iron and solder (if you need to remove any soldered parts) |
To remove any cables or ribbon connectors, follow these steps:
- Identify the cable or ribbon connector you need to remove.
- Use precision tweezers or a plastic spudger to gently lift the locking mechanism on the connector.
- Carefully remove the cable or ribbon from the connector.
- To reconnect a cable or ribbon, gently insert it back into the connector and push the locking mechanism back down.
Remove the Joystick and D-pad Mechanism
Removing the joystick and d-pad mechanism of the Xbox Elite Series 2 controller is a technical process that requires specialized tools and careful attention to detail.
Here are the tools needed and steps to follow:
| Tools needed |
| T6 and T8 Torx screwdrivers |
| Spudger |
| Tweezers |
| Plastic opening tools |
Steps to follow:
- Remove the back panels of the controller using a plastic opening tool.
- Use the T6 screwdriver to remove the screws from the circuit board and joystick assembly.
- Carefully detach the joystick and d-pad mechanism from the controller using a spudger and tweezers.
- Clean the joystick and d-pad mechanism with isopropyl alcohol and cotton swabs.
- Reattach the joystick and d-pad mechanism, screw in the circuit board, and snap the back panels back in place.
Note: It’s essential to be careful throughout the process, as any misstep can permanently damage the controller or its components.
Remove the Face Buttons and Triggers
To take apart an Xbox Elite Series 2 controller, you must first remove the face buttons and triggers. Here are the steps you should take:
| Step | What to do | Tools needed |
| 1 | Gather the necessary tools, including a small Phillips screwdriver, a spudger or pry tool, and a torx screwdriver T8H or T6. | Phillips screwdriver, spudger/pry tool, torx screwdriver |
| 2 | Remove the face buttons by gently prying them off with a spudger or pry tool. Be careful not to damage the buttons or the controller. | Spudger/pry tool |
| 3 | Unscrew the screws under the face buttons with the Phillips screwdriver. | Phillips screwdriver |
| 4 | Use the spudger or pry tool to remove the rubber grips on the controller’s handles. | Spudger/pry tool |
| 5 | Unscrew the screws under the rubber grips with the torx screwdriver. | Torx screwdriver |
| 6 | Take out the triggers by pulling them upward and out of the controller. | N/A |
| 7 | Carefully lift the casing to expose the motherboard. | N/A |
By following these steps, you can easily disassemble your Xbox Elite Series 2 controller for repairs or customization.
Cleaning and Reassembly Steps for the Xbox Elite Series 2 Controller
Taking apart your Xbox Elite Series 2 controller can open up a world of possibilities, from replacing parts like thumbsticks and triggers to cleaning the controller. However, you’ll need a few key tools to get the job done safely and properly. In this article, we’ll cover the tools and steps you need to take apart your Xbox Elite Series 2 controller and clean it.
Cleaning the Internal Parts with Compressed Air and Isopropyl Alcohol
Cleaning the internal parts of an Xbox Elite Series 2 controller is an essential task that every gamer must perform from time to time. Here are the tools you’ll need to get started with cleaning and reassembling the controller:
| A Phillips head screwdriver (PH0 size) |
| Compressed air can |
| Cotton swabs |
| Isopropyl alcohol |
And here are the steps to follow:
1. Remove the 6 screws from the back of the controller with the screwdriver.
2. Lift the top shell carefully and remove it.
3. Use compressed air to clean the dust and debris from the internal parts.
4. Dip a cotton swab in isopropyl alcohol and use it to clean the joystick mechanisms, buttons, and other parts.
5. Use compressed air to blow-dry the internal parts.
6. Reassemble the controller by putting the top shell back and screwing it down.
Cleaning your Xbox Elite Series 2 controller periodically can help you prevent hardware issues while keeping the controller in top condition for a longer time.
Reattach Mechanical Parts such as the Joystick and D-pad Mechanism
Reattaching mechanical parts such as the joystick and d-pad mechanism is a crucial step when cleaning and reassembling the Xbox Elite Series 2 controller.
Here are the steps required to reattach the joystick and d-pad mechanism:
| 1. Align the joystick and its corresponding mechanism with the metal ring on the controller board. |
| 2. Carefully press the joystick into place until it clicks. |
| 3. Use tweezers to position the retaining clip over the joystick assembly and snap it into place. |
| 4. Align the plastic guide underneath the d-pad with its corresponding slot on the controller board. |
| 5. Position the d-pad assembly on top of the guide, ensuring that it is flush with the controller surface. |
| 6. Snap the d-pad assembly into place using the retaining clip. |
Tools needed to take apart Xbox Elite Series 2 controller – T8H and T6 screwdrivers, plastic opening tool, spudger, and a soldering iron (if needed).
Reconnect Any Cables or Ribbon Connectors
When cleaning and reassembling your Xbox Elite Series 2 controller, it is essential to reconnect any cables or ribbon connectors correctly to ensure the controller functions correctly.
Here are the steps to follow:
Required tools for taking apart the controller include a T6 and T8 screwdriver, a plastic opening tool, and a spudger.
| Step | Description |
| 1 | Remove the back panels of the controller using the plastic opening tool. |
| 2 | Remove the screws on the circuit board using the T8 screwdriver, and take the board out carefully. |
| 3 | Remove the rumble motors and triggers gently from the board and disconnect their cables. |
| 4 | Use a spudger to disconnect ribbon connectors from the board. |
| 5 | Clean each component with a microfiber cloth. |
| 6 | Reconnect the rumble motors and triggers and their cables to the board. |
| 7 | Reconnect ribbon connectors. |
| 8 | Place the circuit board inside the housing and reattach back panels using the T6 screwdriver. |
Following these steps will help you clean and reassemble your Xbox Elite Series 2 controller correctly.
Reassemble the Front and Back Plates of the Controller Using Screws and a Pry Tool
After cleaning the individual components of the Xbox Elite Series 2 controller, it is time to reassemble the controller. You will need screws and a pry tool to reassemble the front and back plates of the controller.
Here are the steps to follow:
| 1. Take the backplate and align it with the front plate, ensuring that all pins are in place. |
| 2. Use the screws and screwdriver to secure the plates, taking care not to over-tighten the screws. |
| 3. Once the plates are securely in place, gently push the triggers, bumpers, and buttons to ensure they are functioning correctly. |
| 4. Snap the paddles back onto the controller. |
| 5. Turn on the controller and test all buttons, triggers, and bumpers. |